(→Bosses) Tag: Visual edit |
No edit summary Tag: Source edit |
||
| (82 intermediate revisions by 49 users not shown) | |||
| Line 1: | Line 1: | ||
| ⚫ | |||
| ⚫ | |||
| ⚫ | |||
| ⚫ | |||
| ⚫ | |||
| ⚫ | |||
| ⚫ | |||
| ⚫ | |||
| ⚫ | |||
| ⚫ | |||
| ⚫ | |||
| ⚫ | |||
| − | | dr = {{revengeance|35%}} |
||
| ⚫ | |||
| − | | immuneall = yes <!-- Adding this will change the meaning of immune1, immune2 etc to vulnerability --> |
||
| ⚫ | |||
| ⚫ | |||
| ⚫ | |||
| ⚫ | |||
| ⚫ | |||
| − | | immune6 = Demon Flames |
||
| − | | immune7 = Plague |
||
| − | | immune8 = Nightwither |
||
| − | | immune9 = Shred |
||
| − | | immune10 = Whispering Death |
||
| − | | immune11 = Silva Stun |
||
| − | | immune12 = Daybroken |
||
| − | | immune13 = Holy Flames |
||
| − | | immune14 = God Slayer Inferno |
||
| − | | immune15 = Shellfish Claps |
||
| − | | immune16 = Enraged |
||
| − | | immune17 = Sulphuric Poisoning |
||
| − | | immune18 = Betsy's Curse |
||
| − | | immune19 = Astral Infection (debuff) |
||
| − | | immune20 = Oiled |
||
| − | | immune21 = Dryad's Bane |
||
| − | | immune22 = Penetrated |
||
| − | | immune23 = Celled |
||
| − | | immune24 = War Cleave |
||
| − | | immune25 = Kami Flu |
||
| ⚫ | |||
| ⚫ | |||
| ⚫ | |||
| ⚫ | |||
| − | | debufftip = You are dripping water |
||
| ⚫ | |||
| ⚫ | |||
| − | | debuff2 = Armor Crunch |
||
| ⚫ | |||
| ⚫ | |||
| ⚫ | |||
| ⚫ | |||
| ⚫ | |||
| ⚫ | |||
| ⚫ | |||
| ⚫ | |||
| ⚫ | |||
| ⚫ | |||
| ⚫ | |||
| ⚫ | |||
| ⚫ | |||
| − | | dr = {{revengeance|5%}} |
||
| ⚫ | |||
| − | | immuneall = yes <!-- Adding this will change the meaning of immune1, immune2 etc to vulnerability --> |
||
| ⚫ | |||
| ⚫ | |||
| ⚫ | |||
| ⚫ | |||
| − | | immune5 = Armor Crunch |
||
| − | | immune6 = Demon Flames |
||
| − | | immune7 = Plague |
||
| − | | immune8 = Nightwither |
||
| − | | immune9 = Shred |
||
| − | | immune10 = Whispering Death |
||
| − | | immune11 = Silva Stun |
||
| − | | immune12 = Daybroken |
||
| − | | immune13 = Holy Flames |
||
| − | | immune14 = God Slayer Inferno |
||
| − | | immune15 = Marked |
||
| − | | immune16 = Shellfish Claps |
||
| − | | immune17 = Enraged |
||
| − | | immune18 = Sulphuric Poisoning |
||
| − | | immune19 = Betsy's Curse |
||
| − | | immune20 = Oiled |
||
| − | | immune21 = Dryad's Bane |
||
| − | | immune22 = Penetrated |
||
| − | | immune23 = Celled |
||
| − | | immune24 = Astral Infection (debuff) |
||
| − | | immune25 = On Fire! |
||
| − | | immune26 = Poisoned |
||
| − | | immune27 = War Cleave |
||
| − | | immune28 = Kami Flu |
||
| ⚫ | |||
| ⚫ | |||
| − | | debuff = Wet |
||
| − | | debufftip = You are dripping water |
||
| − | | duration = 2 seconds (Contact) |
||
| − | | debuffchance = 100% |
||
| ⚫ | |||
| ⚫ | |||
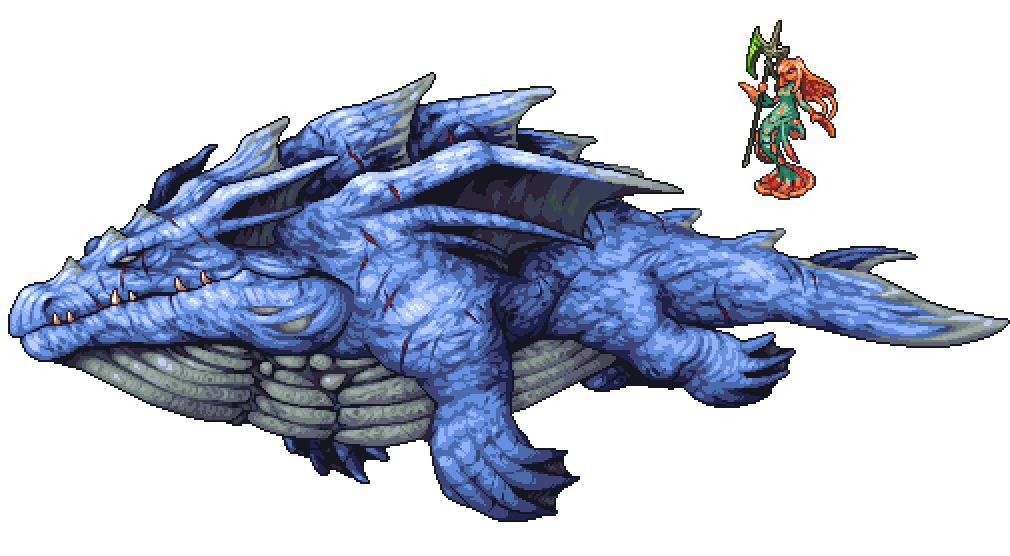
| imagealt = [[File:Leviathan and Anahita.png|350px]] |
| imagealt = [[File:Leviathan and Anahita.png|350px]] |
||
| name = Leviathan and Anahita |
| name = Leviathan and Anahita |
||
| Line 105: | Line 7: | ||
| knockback = 100 |
| knockback = 100 |
||
| money = {{value|0|30}} |
| money = {{value|0|30}} |
||
| + | | Crocodile Scale|20-30|100% {{fantag|Calamity: Community Remix}} |
||
|group|At least one of the following 7 weapons will always drop:|7 |
|group|At least one of the following 7 weapons will always drop:|7 |
||
| Anahita's Arpeggio|1|{{dv|25%|33.33%}} |
| Anahita's Arpeggio|1|{{dv|25%|33.33%}} |
||
| Line 113: | Line 16: | ||
| Leviathan Teeth|1|{{dv|25%|33.33%}} |
| Leviathan Teeth|1|{{dv|25%|33.33%}} |
||
| Leviatitan|1|{{dv|25%|33.33%}} |
| Leviatitan|1|{{dv|25%|33.33%}} |
||
| ⚫ | |||
| Pearl of Enthrallment|1|{{dv|25%|33.33%}} |
| Pearl of Enthrallment|1|{{dv|25%|33.33%}} |
||
| + | | The Community|1|10% |
||
| Bottomless Water Bucket|1|10% |
| Bottomless Water Bucket|1|10% |
||
| Hotline Fishing Hook|1|10% |
| Hotline Fishing Hook|1|10% |
||
| Line 122: | Line 27: | ||
| Greater Healing Potion|10-30|100% |
| Greater Healing Potion|10-30|100% |
||
| Anahita Mask|1|14.29% |
| Anahita Mask|1|14.29% |
||
| ⚫ | |||
| Leviathan Mask|1|14.29% |
| Leviathan Mask|1|14.29% |
||
| ⚫ | |||
| Leviathan Trophy|1|10% |
| Leviathan Trophy|1|10% |
||
| − | | |
+ | |71=20-40|72=100%|73=custom|74={{item|The Ocean (Lore)|note=(Always on first kill)|wrap=y}}|75=100%|76=custom|77={{item|Leviathan and Anahita (Lore)|note=(Always on first kill)|wrap=y}}|78=100%| listexclude = yes |
| − | | custom| {{item|Leviathan and Anahita (Lore)|note=(Always on first kill)|wrap=y}}|100% |
||
| − | | custom| {{item|Treasure Bag (The Leviathan)|Treasure Bag|note=(The Leviathan)|wrap=y}} |
||
| ⚫ | |||
| − | | custom| {{item|The Community|note=(In [[Revengeance Mode]] only)|wrap=y}}|{{revengeance|1%}} |
||
| − | | listexclude = yes |
||
| boxwidth = 30em |
| boxwidth = 30em |
||
}}<section end=npc infobox /> |
}}<section end=npc infobox /> |
||
| Line 136: | Line 36: | ||
{{dablink|If you were looking for something other than Anahita or the Leviathan, see [[Anahita (disambiguation)]] and [[Leviathan (disambiguation)]].}} |
{{dablink|If you were looking for something other than Anahita or the Leviathan, see [[Anahita (disambiguation)]] and [[Leviathan (disambiguation)]].}} |
||
| − | '''The Leviathan''' and '''Anahita''' are a duo of [[bosses]] that can be fought at any point in the game, but is intended to be fought during [[Hardmode]]. It is recommended that the player acquire post-[[Plantera]] equipment before engaging the bosses, as they are very challenging and require the management of two boss-tier [[enemies]] with several summons all at once. |
+ | '''The Leviathan''' (Japanese: リヴァイアサン ''Rivu~aiasan'') and '''Anahita''' (Japanese: アナヒタ ''Anahita'') are a duo of [[bosses]] that can be fought at any point in the game, but is intended to be fought during [[Hardmode]]. It is recommended that the player acquire post-[[Plantera]] equipment before engaging the bosses, as they are very challenging and require the management of two boss-tier [[enemies]] with several summons all at once. |
== Spawn == |
== Spawn == |
||
| − | To begin the boss fight, the player has to kill |
+ | To begin the boss fight, the player has to kill any [[Ocean]] enemy with a [[Wakasagihime]], or kill a statue of Anahita which spawns randomly in the [[Ocean]]. Doing this will spawn just Anahita at first, and The Leviathan herself will only spawn once Anahita reaches 40% health. |
== Bosses == |
== Bosses == |
||
| ⚫ | |||
| ⚫ | |||
| ⚫ | |||
| ⚫ | |||
| ⚫ | |||
| ⚫ | |||
| ⚫ | |||
| ⚫ | |||
| ⚫ | |||
| ⚫ | |||
| ⚫ | |||
| + | | dr = 35% |
||
| ⚫ | |||
| ⚫ | |||
| + | | immune2 = Confused |
||
| + | | vulnerable1 = Fire |
||
| + | | vulnerable2 = Stab |
||
| + | | vulnerable3 = Unholy |
||
| + | | resistant1 = Water |
||
| + | | resistant2 = Cold |
||
| + | | resistant3 = Dark |
||
| ⚫ | |||
| ⚫ | |||
| ⚫ | |||
| ⚫ | |||
| + | | debufftip = Cannot regenerate life |
||
| ⚫ | |||
| ⚫ | |||
| ⚫ | |||
| ⚫ | |||
| ⚫ | |||
| ⚫ | |||
| + | | hurt = NPC_Hit_56.wav |
||
| + | | killed = NPC_Killed_60.wav |
||
| + | | sound = Zombie_38.wav, Zombie_39.wav, Zombie_40.wav |
||
| + | | soundtext = Idle |
||
| + | | sound2 = Zombie_92.wav |
||
| + | | sound2text = Roar |
||
| + | | sound3 = LeviathanRoarMeteor.wav |
||
| + | | sound3text = Meteor |
||
| + | | sound4 = LeviathanRoarCharge.wav |
||
| + | | sound4text = Charge |
||
| ⚫ | |||
| ⚫ | |||
| ⚫ | |||
| ⚫ | |||
| ⚫ | |||
| ⚫ | |||
| ⚫ | |||
| ⚫ | |||
| ⚫ | |||
| ⚫ | |||
| + | | dr = 20% |
||
| ⚫ | |||
| ⚫ | |||
| ⚫ | |||
| + | | immune3 = Glacial State |
||
| ⚫ | |||
| ⚫ | |||
| + | | vulnerable1 = Fire |
||
| + | | vulnerable2 = Slash |
||
| + | | vulnerable3 = Unholy |
||
| + | | resistant1 = Water |
||
| + | | resistant2 = Cold |
||
| ⚫ | |||
| ⚫ | |||
| + | | hurt = NPC_Hit_1.wav |
||
| + | | killed = NPC_Killed_1.wav |
||
| + | | sound = Zombie_35.wav |
||
| + | | soundtext = Idle |
||
| + | | sound2 = Item_85.wav |
||
| + | | sound2text = Bubble |
||
| + | | sound3 = Item_21.wav |
||
| + | | sound3text = Water Spear |
||
| + | | sound4 = Item_30.wav |
||
| + | | sound4text = Ice Mist |
||
| + | | sound5 = Item_26.wav |
||
| + | | sound5text = Treble Clef |
||
| ⚫ | |||
| + | }} |
||
| + | |||
== Behavior == |
== Behavior == |
||
| − | This boss encounter is made up of two individual bosses: Anahita and The Leviathan. Both enemies must be defeated to count as a full kill and receive loot. Only Anahita is summoned at the start, but after she reaches 40% of her health, The Leviathan is summoned. She stops attacking the player and becomes invulnerable until The Leviathan reaches 40% health. |
+ | This boss encounter is made up of two individual bosses: Anahita and The Leviathan. Both enemies must be defeated to count as a full kill and receive loot. Only Anahita is summoned at the start, but after she reaches 40% of her health, The Leviathan is summoned after a brief animation. She stops attacking the player and becomes invulnerable until The Leviathan reaches 40% health. If the player leaves the Ocean biome during the battle, the bosses will enter an enraged state: Anahita moves faster, summons projectiles more frequently, and her projectiles move faster, while The Leviathan's movement speed and meteor speed are massively increased. |
==== Anahita ==== |
==== Anahita ==== |
||
| − | *She |
+ | *She hovers above the player while periodically performing one of three attacks, all of them converging on the player's location. |
| − | **Summons |
+ | **Summons 8 water spears, which continue to travel after converging. |
| − | **Summons |
+ | **Summons 3 icicles, which home in on the player after converging. |
| − | **Summons |
+ | **Summons 6 treble clefs which move slower, linger for an extended period of time. |
| − | ** |
+ | **Below 70% health, she summons more projectiles during these attacks. This change is reverted while The Leviathan is alive and Anahita is above 20% health. |
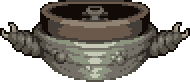
*She additionally can summon Detonating Bubbles that inflict the Wet debuff for 7 seconds. |
*She additionally can summon Detonating Bubbles that inflict the Wet debuff for 7 seconds. |
||
| − | *She |
+ | *She generates an ice shield at 100%, 70%, and 40% health, rendering her invulnerable to damage until it's destroyed. |
**The ice shield blocks non-minion piercing projectiles. |
**The ice shield blocks non-minion piercing projectiles. |
||
| − | * |
+ | *When below 70% health, she will occasionally charge at the player 3 times. |
| − | **She won't perform this attack if |
+ | **She won't perform this attack if she is above 20% health and The Leviathan is alive. |
*She becomes enraged if The Leviathan is defeated first. |
*She becomes enraged if The Leviathan is defeated first. |
||
==== The Leviathan ==== |
==== The Leviathan ==== |
||
| − | *She mainly stays on one side of the player, switching sides if the player |
+ | *She mainly stays on one side of the player while cycling through her attacks, switching sides if the player moves around her. |
*She fires meteors at the player, which inflict the [[Armor Crunch]] debuff. |
*She fires meteors at the player, which inflict the [[Armor Crunch]] debuff. |
||
| − | *She summons [[Aquatic Aberration |
+ | *She summons [[Aquatic Aberration]]s to attack the player. |
| − | * |
+ | *When below {{dv|40%|70%}} health, she pauses for a few moments before aligning with the player horizontally then charging at them. |
| − | **She won't perform this attack |
+ | **She won't perform this attack while she is above 20% health and Anahita is alive. |
*She becomes enraged if Anahita is defeated first. |
*She becomes enraged if Anahita is defeated first. |
||
=== In [[Expert Mode]] === |
=== In [[Expert Mode]] === |
||
*Anahita is much more aggressive and deals more damage. |
*Anahita is much more aggressive and deals more damage. |
||
| + | *The Leviathan can now charge at the player below 70% HP. |
||
=== In [[Revengeance Mode]] === |
=== In [[Revengeance Mode]] === |
||
| − | *The Leviathan shoots faster |
+ | *The Leviathan shoots faster. |
=== In [[Death Mode]] === |
=== In [[Death Mode]] === |
||
| + | *When the ??? is killed, the Leviathan will be immediately summoned while Anahita becomes passive. Anahita will become active and join the battle once the Leviathan reaches 70% HP. |
||
| − | *Anahita has increased velocity and spends less time firing bubbles at the player. |
||
| + | *The Leviathan and Anahita can use any of their attacks regardless of current HP or whether the other is currently active. |
||
| − | *After she charges, The Leviathan charges a second time. |
||
| + | *The Leviathan charges 3 times in a row. |
||
| − | *Both bosses are always in their enraged state. |
||
== Summons == |
== Summons == |
||
| Line 187: | Line 169: | ||
| damage = {{dv|55|boost=0.15}} |
| damage = {{dv|55|boost=0.15}} |
||
| defense = 10 |
| defense = 10 |
||
| − | | dr = |
+ | | dr = 50% |
| knockback = 10 |
| knockback = 10 |
||
| + | | vulnerable1 = Fire |
||
| + | | vulnerable2 = Stab |
||
| + | | resistant1 = Water |
||
| + | | resistant2 = Cold |
||
| hardmode = yes |
| hardmode = yes |
||
| debuff = Frostburn |
| debuff = Frostburn |
||
| Line 194: | Line 180: | ||
| duration = 4 seconds |
| duration = 4 seconds |
||
| debufftip = It's either really hot or really cold. Either way it REALLY hurts |
| debufftip = It's either really hot or really cold. Either way it REALLY hurts |
||
| + | | immune1 = Confused |
||
| ⚫ | |||
| + | | immune3 = Glacial State |
||
| ⚫ | |||
| ⚫ | |||
| + | | hurt = NPC_Hit_5.wav |
||
| + | | killed = NPC_Killed_7.wav |
||
}} |
}} |
||
}} |
}} |
||
| Line 199: | Line 192: | ||
! Image !! Name !! Condition |
! Image !! Name !! Condition |
||
|- |
|- |
||
| − | | align = center |{{item|mode=table|Detonating Bubble}} || |
+ | | align = center |{{item|mode=table|Detonating Bubble}} || Anahita is active |
| − | |- |
||
| − | | align = left |{{item|mode=table|Parasea}} || Always |
||
|- |
|- |
||
| − | | align = left |{{item|mode=table|Aquatic Aberration}} || |
+ | | align = left |{{item|mode=table|Aquatic Aberration}} || The Leviathan is active |
|} |
|} |
||
== Aftermath == |
== Aftermath == |
||
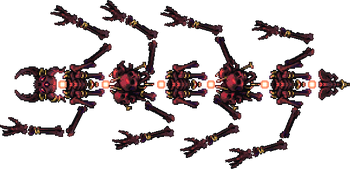
*Once defeated, [[Giant Cursed Skull]]s will begin to drop [[Keelhaul]]. |
*Once defeated, [[Giant Cursed Skull]]s will begin to drop [[Keelhaul]]. |
||
| + | *[[Crocodile Herring]] will begin spawning in the Ocean, dropping a renewable source of [[Crocodile Scale]]s. |
||
| + | *[[Green Demon|Green Demons]] will begin spawning during [[Solar Eclipse|Solar Eclipses]], giving the player access to [[Green Demon Head|Green Demon Heads.]] |
||
| + | *A message will appear in the chat, giving players a code to claim a €1 discount on the official [https://youpads.com/product/ocean-creatures-stickers/ Ocean Creatures Sticker Pack]. |
||
== Notes == |
== Notes == |
||
*Even though the summon appears even at the very beginning of the game, it's not recommended to fight this boss until later in Hardmode. |
*Even though the summon appears even at the very beginning of the game, it's not recommended to fight this boss until later in Hardmode. |
||
*Anahita's frost shield deletes projectiles on contact. This means some projectiles will fail to function correctly, such as the [[SHPC]]'s primary fire. |
*Anahita's frost shield deletes projectiles on contact. This means some projectiles will fail to function correctly, such as the [[SHPC]]'s primary fire. |
||
| − | *In the possible, though unlikely circumstance that the Leviathan and Anahita are lured to the [[Sulphurous Sea]] [[biome]], it ''will'' be considered as the Ocean and they will be |
+ | *In the possible, though unlikely circumstance that the Leviathan and Anahita are lured to the [[Sulphurous Sea]] [[biome]], it ''will'' be considered as the Ocean and they will not be enraged. |
*Both Anahita and the Leviathan will each drop 5-15 [[Greater Healing Potion]]s separately when killed. |
*Both Anahita and the Leviathan will each drop 5-15 [[Greater Healing Potion]]s separately when killed. |
||
*When players have the Wet debuff, Anahita's projectiles have a lower velocity. |
*When players have the Wet debuff, Anahita's projectiles have a lower velocity. |
||
*Even with Anahita's many resistances, they are neither immune to the [[Poisoned]] nor the [[On Fire!]] debuffs. |
*Even with Anahita's many resistances, they are neither immune to the [[Poisoned]] nor the [[On Fire!]] debuffs. |
||
| + | *You can stop Anahita and '''???''' from spawning by using [[Sirenproof Earmuffs]] |
||
| − | == |
+ | ==Tips== |
{{dablink|For more elaborate strategies on defeating Leviathan and Anahita, including [[weapon]] and [[tgc:Guide:Arena|arena]] recommendations, see [[Guide:Leviathan and Anahita strategies]].}} |
{{dablink|For more elaborate strategies on defeating Leviathan and Anahita, including [[weapon]] and [[tgc:Guide:Arena|arena]] recommendations, see [[Guide:Leviathan and Anahita strategies]].}} |
||
*Making 3-4 layers of platforms that are the whole length of the Ocean may make it easier to dodge their attacks. |
*Making 3-4 layers of platforms that are the whole length of the Ocean may make it easier to dodge their attacks. |
||
| ⚫ | |||
| − | *The [[Terra Blade]] or the [[Terra Edge]] are both extremely powerful against Anahita and Leviathan, as both have high fire rates and damage values. |
||
| − | *The [[Snowman Cannon]] is very effective for both bosses. |
||
| − | *Fast magic weapons like [[Razorpine]] and the [[Bat Scepter]] are very effective against Anahita due to her high mobility. |
||
| − | *Magic weapons such as the [[Terra Ray]], [[Lashes of Chaos]] and [[Blizzard Staff]] are very effective at hitting the Leviathan due to her large hitbox. |
||
| − | *[[Minion]]s don't seem to be able to target the Leviathan and will kill Anahita instead, so Summoners might want to switch gear for this encounter. |
||
| − | **Alternatively, one can use the {{key|Interact}} key (right click) while holding a summoner weapon to target the Leviathan instead. |
||
| − | *The [[Duststorm in a Bottle]] is a good choice for Rogue players due to its high base damage. |
||
| − | *[[Fantasy Talisman]]s' stealth strikes are exceptionally useful against the duo, as they do not require much attention once the cards latch, allowing for more time to dodge. |
||
| − | *The [[Nychthemeron]]'s stealth strike is a great option to use in the fight, as the orbs can deal good damage against Anahita when used correctly and both of its projectiles can linger and deal much more damage towards the Leviathan. |
||
| − | *The [[Lunic Eye]] and the [[Everglade Spray]] are extremely useful in reducing the Leviathan’s high defense. |
||
| − | *[[Ankh Shield]] provides immunity to knockback and the confused debuff, making it an effective accessory during the fight. |
||
| − | *Dodging is key during this fight, thus dashing [[accessories]] such as the [[Counter Scarf]] and the [[Master Ninja Gear]] should be prioritized. |
||
| − | *It is recommended to use [[Angel Treads]] or a [[Water Walking Potion]] to stay afloat during this fight, allowing you to reset the players [[wings]] on contact. |
||
| − | **Alternatively, the player can use accessories that increase mobility underwater, such as the [[Abyssal Diving Gear]] or the [[Flipper Potion]]. |
||
| ⚫ | *Once the Leviathan has reached 50% of her health, care should be taken to be aware of where she is as she will start charging the player. Should she be on the left or right side of the player, it is important to dodge it either moving down or above where the Leviathan is going |
||
*Using [[Water Candle]], [[Chaos Candle]], [[Battle]], and [[Zerg]] [[buffs]] in combination will make ??? spawn over 5x more often, making the bosses much more readily available. |
*Using [[Water Candle]], [[Chaos Candle]], [[Battle]], and [[Zerg]] [[buffs]] in combination will make ??? spawn over 5x more often, making the bosses much more readily available. |
||
| − | **This will also increase the spawn rate of ocean enemies so be cautious. |
+ | ** This will also increase the spawn rate of ocean enemies, so be cautious. |
| − | == |
+ | ==Trivia== |
*Anahita's [[Music|theme]] is [https://www.youtube.com/watch?v=6x-4QwJZu5A&t=29m36s '''Siren's War Cry'''], which was composed by the artist [https://www.youtube.com/user/SUPEREMERALD123 DM DOKURO]. |
*Anahita's [[Music|theme]] is [https://www.youtube.com/watch?v=6x-4QwJZu5A&t=29m36s '''Siren's War Cry'''], which was composed by the artist [https://www.youtube.com/user/SUPEREMERALD123 DM DOKURO]. |
||
**Siren's War Cry is the only Calamity theme to not be featured in its own video, instead only appearing in an "Extended" version alongside the other themes for Leviathan and Anahita. This is due to the fact that Siren's War Cry was made sometime after the other two themes, in response to a rework to the fight which now included Anahita being fought on her own. |
**Siren's War Cry is the only Calamity theme to not be featured in its own video, instead only appearing in an "Extended" version alongside the other themes for Leviathan and Anahita. This is due to the fact that Siren's War Cry was made sometime after the other two themes, in response to a rework to the fight which now included Anahita being fought on her own. |
||
| Line 244: | Line 225: | ||
**If the Calamity Music add-on mod is disabled, '''Boss 3''' will play instead for Leviathan and Anahita. |
**If the Calamity Music add-on mod is disabled, '''Boss 3''' will play instead for Leviathan and Anahita. |
||
*The dual nature of the fight took inspiration from the Ornstein and Smough fight from Dark Souls. |
*The dual nature of the fight took inspiration from the Ornstein and Smough fight from Dark Souls. |
||
| + | *The Leviathan appears to be a fully grown [[Crocodile Herring]] {{fantag|Calamity: Community Remix}}. |
||
*In previous versions of the mod, Anahita had two color schemes with one randomly being chosen upon her spawning. Some of her features would be either greener or more blue. This was the reasoning for the [[Aquatic Heart]] having two variants based on color. |
*In previous versions of the mod, Anahita had two color schemes with one randomly being chosen upon her spawning. Some of her features would be either greener or more blue. This was the reasoning for the [[Aquatic Heart]] having two variants based on color. |
||
*Originally, Anahita and Leviathan shared their [[lore]] entry. |
*Originally, Anahita and Leviathan shared their [[lore]] entry. |
||
*Anahita was previously named '''The Siren'''. Prior to that, she was known as the '''Siren Lure'''. |
*Anahita was previously named '''The Siren'''. Prior to that, she was known as the '''Siren Lure'''. |
||
| + | *If the [https://forums.terraria.org/index.php?threads/boss-checklist-in-game-progression-checklist.50668/ Boss Checklist Mod] is installed, their unique despawn message will be "The aquatic entities sink back beneath the ocean depths." |
||
| − | == Lore == |
||
| − | === The Leviathan === |
||
| − | {{lore|The Leviathan}} |
||
| − | === Anahita === |
||
| − | {{lore|Anahita}} |
||
{{Master Template Characters |
{{Master Template Characters |
||
| show-main = yes |
| show-main = yes |
||
Latest revision as of 04:16, 6 December 2023
| Type | Boss – Aquatic |
|---|---|
| Environment | Ocean |
| KB Resist | 100% |
| Coins | 30 |
|---|
- Item (Quantity)Rate
 Crocodile Scale (20-30)100%
- At least one of the following 7 weapons will always drop:
- 25% / 33.33%
- 25% / 33.33%
- 25% / 33.33%
- 25% / 33.33%
- 25% / 33.33%
- 25% / 33.33%
- 25% / 33.33%
- 100%
- 25% / 33.33%
- 10%
- 10%
- 10%
- 10%
- Crate Potion (5-8)20%
- Fishing Potion (5-8)20%
- Sonar Potion (5-8)20%
- Greater Healing Potion (10-30)100%
- 14.29%
- 14.29%
- 10%
- 10%
- Leviathan Trophy (20-40)100%
- The Ocean (Lore)(Always on first kill)100%
- Leviathan and Anahita (Lore)(Always on first kill)100%


![]() "...Two genetic misfits outcast from their homes..."
"...Two genetic misfits outcast from their homes..." ![]()
- If you were looking for something other than Anahita or the Leviathan, see Anahita (disambiguation) and Leviathan (disambiguation).
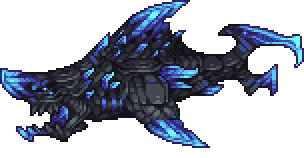
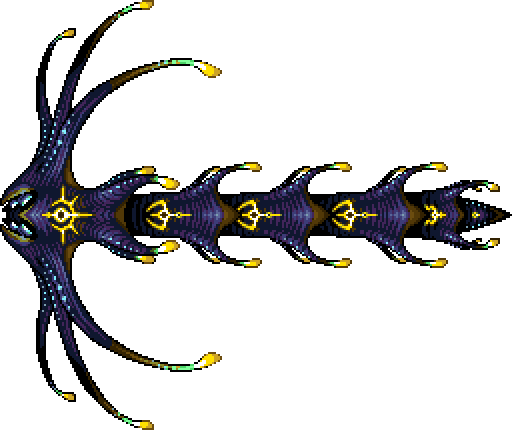
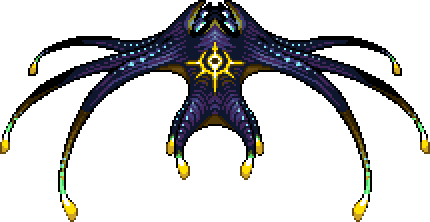
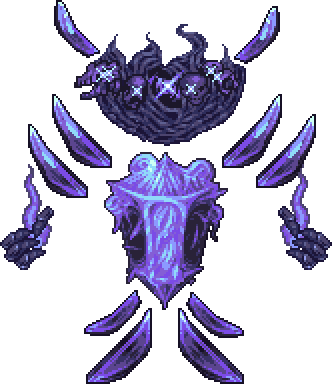
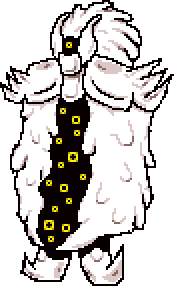
The Leviathan (Japanese: リヴァイアサン Rivu~aiasan) and Anahita (Japanese: アナヒタ Anahita) are a duo of bosses that can be fought at any point in the game, but is intended to be fought during Hardmode. It is recommended that the player acquire post-Plantera equipment before engaging the bosses, as they are very challenging and require the management of two boss-tier enemies with several summons all at once.
Spawn
To begin the boss fight, the player has to kill any Ocean enemy with a Wakasagihime, or kill a statue of Anahita which spawns randomly in the Ocean. Doing this will spawn just Anahita at first, and The Leviathan herself will only spawn once Anahita reaches 40% health.
Bosses
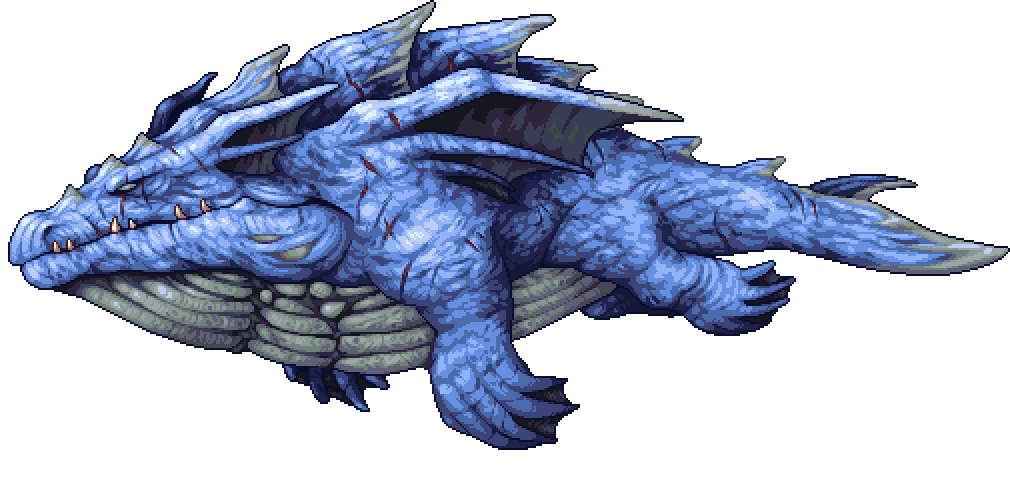
| Type | Boss – Aquatic |
|---|---|
| Environment | Ocean |
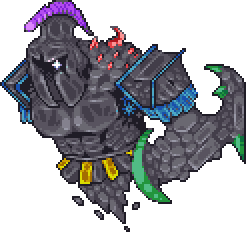
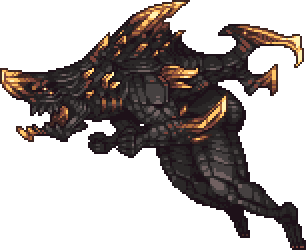
| AI Type | The Leviathan AI |
| Damage | 90 / 216 / 240 / 252 (Contact) 88 / 140 / 160 / 172 (Meteor) |
| Max Life | 60,560 / 96,800 / 116,096 |
| Defense | 40 80 (when enraged) |
| DR | 35% |
| KB Resist | 100% |
| Inflicts debuff | 100% chance |
| Debuff duration | 4 seconds (Contact) |
| Debuff tooltip | Cannot regenerate life |
| Inflicts debuff | 100% chance |
| Debuff duration | 5 seconds (Meteor) |
| Debuff tooltip | Your armor is shredded |
| Immune to | |
| Vulnerable to: | |
| Resistant to: |

| Type | Boss – Aquatic |
|---|---|
| Environment | Ocean |
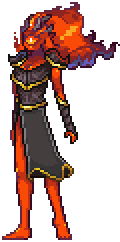
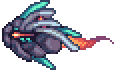
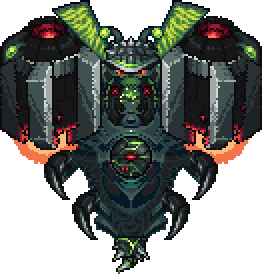
| AI Type | Anahita AI |
| Damage | 70 / 112 / 136 / 144 (Contact) 105 / 168 / 204 / 216 (Charging contact) 72 / 116 / 136 / 144 (Ice mist, Water spears & Treble clefs) |
| Max Life | 34,700 / 55,520 / 66,560 |
| Defense | 25 37 (when enraged above half health) 50 (when enraged below half health) |
| DR | 20% |
| KB Resist | 100% |
| Immune to | |
| Vulnerable to: | |
| Resistant to: |
Behavior
This boss encounter is made up of two individual bosses: Anahita and The Leviathan. Both enemies must be defeated to count as a full kill and receive loot. Only Anahita is summoned at the start, but after she reaches 40% of her health, The Leviathan is summoned after a brief animation. She stops attacking the player and becomes invulnerable until The Leviathan reaches 40% health. If the player leaves the Ocean biome during the battle, the bosses will enter an enraged state: Anahita moves faster, summons projectiles more frequently, and her projectiles move faster, while The Leviathan's movement speed and meteor speed are massively increased.
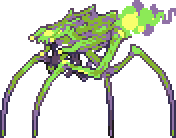
Anahita
- She hovers above the player while periodically performing one of three attacks, all of them converging on the player's location.
- Summons 8 water spears, which continue to travel after converging.
- Summons 3 icicles, which home in on the player after converging.
- Summons 6 treble clefs which move slower, linger for an extended period of time.
- Below 70% health, she summons more projectiles during these attacks. This change is reverted while The Leviathan is alive and Anahita is above 20% health.
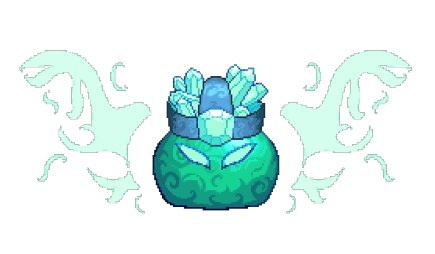
- She additionally can summon Detonating Bubbles that inflict the Wet debuff for 7 seconds.
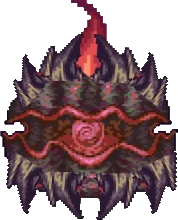
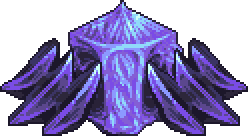
- She generates an ice shield at 100%, 70%, and 40% health, rendering her invulnerable to damage until it's destroyed.
- The ice shield blocks non-minion piercing projectiles.
- When below 70% health, she will occasionally charge at the player 3 times.
- She won't perform this attack if she is above 20% health and The Leviathan is alive.
- She becomes enraged if The Leviathan is defeated first.
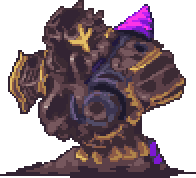
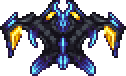
The Leviathan
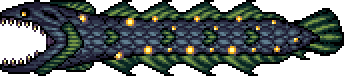
- She mainly stays on one side of the player while cycling through her attacks, switching sides if the player moves around her.
- She fires meteors at the player, which inflict the Armor Crunch debuff.
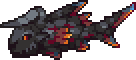
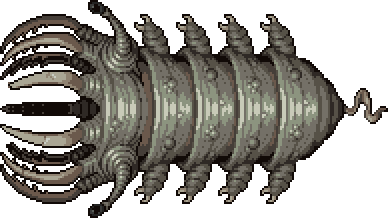
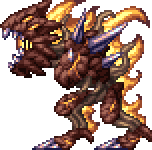
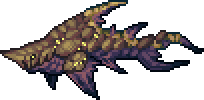
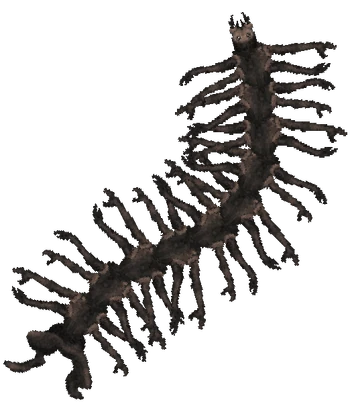
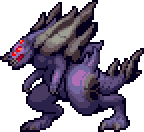
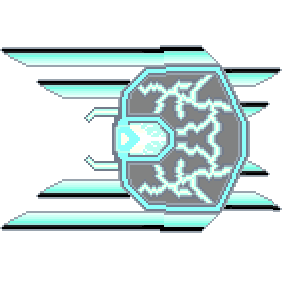
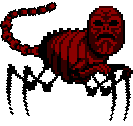
- She summons Aquatic Aberrations to attack the player.
- When below 40% / 70% health, she pauses for a few moments before aligning with the player horizontally then charging at them.
- She won't perform this attack while she is above 20% health and Anahita is alive.
- She becomes enraged if Anahita is defeated first.
In Expert Mode
- Anahita is much more aggressive and deals more damage.
- The Leviathan can now charge at the player below 70% HP.
In Revengeance Mode
- The Leviathan shoots faster.
In Death Mode
- When the ??? is killed, the Leviathan will be immediately summoned while Anahita becomes passive. Anahita will become active and join the battle once the Leviathan reaches 70% HP.
- The Leviathan and Anahita can use any of their attacks regardless of current HP or whether the other is currently active.
- The Leviathan charges 3 times in a row.
Summons

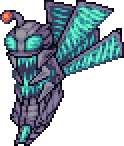
| Type | Flying Enemy |
|---|---|
| Environment | Ocean |
| AI Type | Ice Shield AI |
| Damage | 55 / 110 / 126 / 136 |
| Max Life | 650 / 1300 |
| Defense | 10 |
| DR | 50% |
| KB Resist | 10% |
| Inflicts debuff | 100% chance |
| Debuff duration | 4 seconds |
| Debuff tooltip | It's either really hot or really cold. Either way it REALLY hurts |
| Immune to | |
| Vulnerable to: | |
| Resistant to: |
| Image | Name | Condition |
|---|---|---|
| Detonating Bubble | Anahita is active | |
| Aquatic Aberration | The Leviathan is active |
Aftermath
- Once defeated, Giant Cursed Skulls will begin to drop Keelhaul.
- Crocodile Herring will begin spawning in the Ocean, dropping a renewable source of Crocodile Scales.
- Green Demons will begin spawning during Solar Eclipses, giving the player access to Green Demon Heads.
- A message will appear in the chat, giving players a code to claim a €1 discount on the official Ocean Creatures Sticker Pack.
Notes
- Even though the summon appears even at the very beginning of the game, it's not recommended to fight this boss until later in Hardmode.
- Anahita's frost shield deletes projectiles on contact. This means some projectiles will fail to function correctly, such as the SHPC's primary fire.
- In the possible, though unlikely circumstance that the Leviathan and Anahita are lured to the Sulphurous Sea biome, it will be considered as the Ocean and they will not be enraged.
- Both Anahita and the Leviathan will each drop 5-15 Greater Healing Potions separately when killed.
- When players have the Wet debuff, Anahita's projectiles have a lower velocity.
- Even with Anahita's many resistances, they are neither immune to the Poisoned nor the On Fire! debuffs.
- You can stop Anahita and ??? from spawning by using Sirenproof Earmuffs
Tips
- For more elaborate strategies on defeating Leviathan and Anahita, including weapon and arena recommendations, see Guide:Leviathan and Anahita strategies.
- Making 3-4 layers of platforms that are the whole length of the Ocean may make it easier to dodge their attacks.
- Once the Leviathan has reached 50% of her health, care should be taken to be aware of where she is as she will start charging the player. Should she be on the left or right side of the player, it is important to dodge it either moving down or above where the Leviathan is going.
- Using Water Candle, Chaos Candle, Battle, and Zerg buffs in combination will make ??? spawn over 5x more often, making the bosses much more readily available.
- This will also increase the spawn rate of ocean enemies, so be cautious.
Trivia
- Anahita's theme is Siren's War Cry, which was composed by the artist DM DOKURO.
- Siren's War Cry is the only Calamity theme to not be featured in its own video, instead only appearing in an "Extended" version alongside the other themes for Leviathan and Anahita. This is due to the fact that Siren's War Cry was made sometime after the other two themes, in response to a rework to the fight which now included Anahita being fought on her own.
- When The Leviathan appears, the theme changes to Forbidden Lullaby, which was also composed by DM DOKURO.
- If the Calamity Music add-on mod is disabled, Boss 3 will play instead for Leviathan and Anahita.
- The dual nature of the fight took inspiration from the Ornstein and Smough fight from Dark Souls.
- The Leviathan appears to be a fully grown Crocodile Herring .
- In previous versions of the mod, Anahita had two color schemes with one randomly being chosen upon her spawning. Some of her features would be either greener or more blue. This was the reasoning for the Aquatic Heart having two variants based on color.
- Originally, Anahita and Leviathan shared their lore entry.
- Anahita was previously named The Siren. Prior to that, she was known as the Siren Lure.
- If the Boss Checklist Mod is installed, their unique despawn message will be "The aquatic entities sink back beneath the ocean depths."


