The Calamity Mod expands on the number of bosses that can be challenged throughout the game, each featuring unique AI and drops. Most require the use of boss summoning items in order to spawn, but others have more unique prerequisites. The initial defeat of bosses (both vanilla and Calamity) typically results in some form of change within the world, be it new enemies appearing or a meteor crash, indicated by status messages to direct players towards the new content. Many also drop lore entries, usually explanations about what they are and why they exist. The mod currently adds twenty-two new boss encounters.
In Expert Mode, bosses drop Treasure Bags which contain powerful Expert-exclusive items in addition to their normal drops. However, many bosses also have new and unique attacks providing players with new challenges to surmount if they hope to reap the rewards. The Calamity Mod's new difficulty modes, Revengeance Mode and Death Mode, increase the challenge even further, often to levels that require rigorous training and complete knowledge of the boss fights if players hope to receive the valuable mode-exclusive rewards. There are other items that activate certain modes that can put the player to the test, further increasing the reward that the player can take, such as the Defiled Rune and Armageddon, while other items, such as the Iron Heart are for bragging rights.
Most bosses in Calamity are designed to be much more difficult than those of vanilla Terraria, offering a challenge even to seasoned players, but are not required to progress through the vanilla game's content. To make up for this, they often drop more powerful equipment and open up new tiers of progression. Any boss that is alive will reduce enemy spawn rate akin to the Zen Potion.
After the player has killed the Moon Lord, a whole new level of progression is unlocked, containing several very powerful bosses that will push the game's mechanics to their limits. These serve to test the player's skill and game knowledge and allow for additional tiers of weapons and items beyond what Terraria's endgame has to offer.
Unprepared players will find these bosses to be spectacularly difficult, but if precautions are taken and proper preparations are made, all of them can be defeated at their respective level of progression. Players are advised to make use of arenas, potions and any other kind of aid they can muster before confronting these challenging bosses.
Pre-Hardmode Bosses
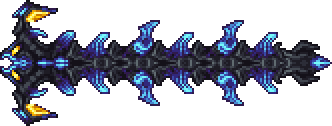
Desert Scourge

|
The Desert Scourge is a large, dry, spiked worm boss with 2,300 health (3,680 health in Expert Mode, 4,240 health in Revengeance Mode, and 8,160 health in Death Mode). It is summoned with a Desert Medallion in the Desert, and does not spawn naturally. While it is intended to be one of the first bosses fought and has a relatively simple AI, its intimidating size and speed can easily overwhelm an unprepared player. It becomes a greater threat in Revengeance Mode, where two smaller Desert Scourges join it in the fight, and it is able to fire a barrage of sand bolts from its segments. The Desert Scourge drops weapons themed around water and electricity, as well as many Victory Shards, an early game crafting material. It drops the Ocean Crest in Expert Mode, an accessory which pacifies several Ocean enemies and allows for limitless underwater breathing. In Revengeance Mode, it also drops the Scourge of the Desert, an early unlimited rogue weapon. |
Crabulon
|
Crabulon is a mushroom crab with 1,800 health (2,880 in Expert Mode, 4,224 in Revengeance Mode, and 11,088 in Death Mode) fought in the Mushroom Biome. It can be summoned by using a Decapodita Sprout while in a Mushroom Biome. While it spawns initially passive, it begins to attack once damaged, jumping and lunging at the player. It fires bursts of mushroom projectiles and summons many Crab Shrooms and walls of mushrooms, which float down in the players direction, as it takes damage. Crabulon drops mushroom-themed weapons and materials related to the Mushroom Biome. It drops the Fungal Clump accessory in Expert Mode, which summons a minion that attaches to enemies, draining their health to heal the player. |
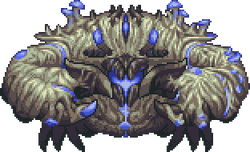
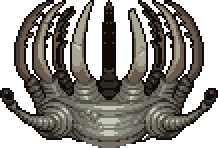
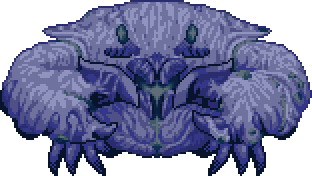
The Hive Mind
|
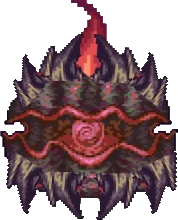
The Hive Mind is a large, brain-like amalgamation with 5,000 health (8,000 in Expert Mode, 12,672 in Revengeance Mode, and 22,080 in Death Mode). It is summoned by using a Teratoma in The Corruption or by killing a Hive Cyst. For its first phase it is immobile, teleporting from time to time, instead relying on its many corrupt minions to attack the player. After losing all of its health, it transitions into its second phase, fully healed and no longer bound to the ground. It now rushes and teleports towards the player, firing slime shots and performing special dash attacks while continuing to summon its servants. The Hive Mind drops weapons themed around corruption and the dark, as well as True Shadow Scales, which can be used to craft its drops and other items. It drops the Rotten Brain in Expert Mode, which increases the player's strength as their health drops, and causes shade rain to fall when they are hit. After defeating it for the first time, Aerialite Ore will generate underground. |
The Perforators

|
The Perforators are a trio of fleshy worms, along with a main hive boss, with 11,000 total health split over the 4 bosses (15,897 in Expert Mode, 17,647 in Revengeance Mode, and 19,946 in Death Mode). It is summoned by using Bloody Worm Food in The Crimson or by killing a Perforator Cyst. The Perforator Hive floats above the player, firing blood clots and ichor blobs in an upward arc as well as directly at the player. As it loses health, it will spawn Perforator worms of increasing size and strength. The Perforators drop weapons themed around flesh and blood, as well as Blood Samples, which can be used to craft their drops and other items. It drops the Bloody Worm Tooth in Expert Mode, which boosts the player's damage reduction and melee strength, doubling its effects if below half health. After they have been defeated for the first time, Aerialite Ore will generate underground. |
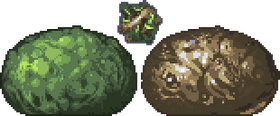
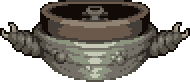
The Slime God
|
The Slime God consists of two separate, giant slimes (the Ebonian Slime God and Crimulan Slime God, both the size of King Slime) and a smaller Slime God Core. It has 10,500 total health split over the 3 bosses (16,800 in Expert Mode, 22,500 in Revengeance Mode, and 31,500 in Death Mode). It is summoned anywhere and at any time with an Overloaded Sludge. The Slime God itself will fly around very quickly, attempting to charge at the player while leaving most of the fighting to its Ebonian and Crimulan Slime God bodyguards. These slimes will perform great jumps towards the player while firing lingering mines, orbs and summoning their own minions. When they reach half health, they will split into smaller, weaker slime gods that will continue to attack. The Slime Gods will get stronger depending on which one is killed first. The Slime God drops weapons themed around slime, The Corruption, and The Crimson, as well as Purified Gel, which can be used to craft its drops and several late Pre-Hardmode items. It drops the Mana Overloader in Expert Mode, which increases magic abilities at a certain cost. In Revengeance Mode, it also drops several units of Purified Jam, an incredibly valuable item that, when used, prevents almost all damage for a short duration. |
Hardmode Bosses
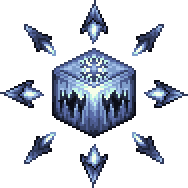
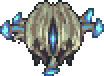
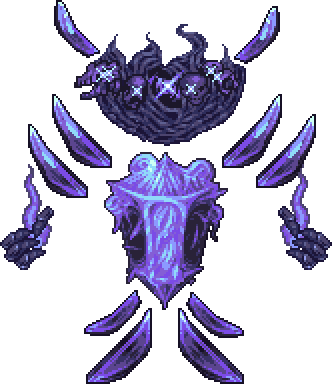
Cryogen
|
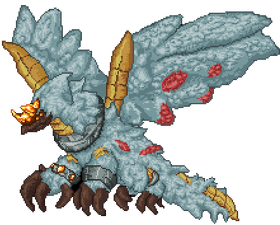
Cryogen is a crystal of sealed frost magic with 17,900 health (28,640 in Expert Mode, 42,080 in Revengeance Mode, and 63,840 in Death Mode). It is summoned by using a Cryo Key in the Snow biome. It has many phases that it transitions through as it loses health, each with different methods of attack, from firing a barrage of frost bolts to derping out and trying to ram the player, all the while summoning minions to assist it. Cryogen drops ice-themed weapons, as well as Frigid Bars, which can be used to craft its drops and other Hardmode items. It drops the Soul of Cryogen in Expert Mode, a wing accessory with added bonuses. It also drops the Frost Flare in Revengeance Mode, which grants an extensive variety of benefits. Defeating it for the first time will generate Cryonic Ore in the Snow biome and cause the Archmage NPC to move into an available house. |
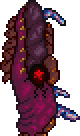
Brimstone Elemental

|
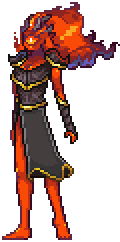
The Brimstone Elemental is a defiled spirit with 26,000 health (41,600 in Expert Mode, 57,132 in Revengeance Mode, and 86,480 in Death Mode). She is summoned by using a Charred Idol in the Brimstone Crag biome. She has three different methods of attack which she switches between on a regular cycle: teleporting around and leaving behind brimstone eruptions, hovering frantically above the player while shooting fireballs, and encasing herself in highly defensive rose petals while firing blasts of projectiles. She also summons minions called Brimlings that shoot gravity affected brimstone fireballs and follow a similar movement pattern to the Brimstone Elemental's first phase. The Brimstone Elemental drops brimstone-themed weapons and accessories, as well as the Gehenna accessory in Expert mode, which causes brimstone fireballs to occasionally fall from the sky when worn. After Providence is defeated, all of her stats are buffed, her health raises to 300,000 (480,000), and she begins dropping Bloodstone. She also begins dropping the Brimrose in Revengeance Mode, a mount with infinite flight time and high movement speed. |
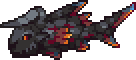
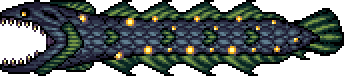
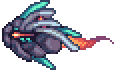
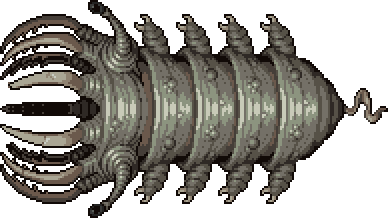
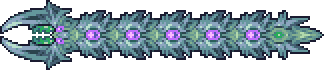
Aquatic Scourge

|
The Aquatic Scourge is a mutated oceanic worm with 73,000 health (116,600 in Expert Mode, 136,000 in Revengeance Mode, 160,000 in Death Mode). It spawns naturally, although very rarely, in the Sulphurous Sea biome, and can also be summoned manually with Seafood. It constantly moves towards the player to ram them, both through the ground and through the air. It periodically vomits bursts of many projectiles, from sulphuric water and gas clouds to homing teeth, and summons several aquatic enemies to assist it in the fight. The Aquatic Scourge drops weapons themed around water and electricity, much like the Desert Scourge to which it is the same species. It will also drop the Aquatic Emblem accessory in Expert Mode, which pacifies ocean enemies, grants unlimited water breathing, and slowly buffs the player's stats while they remain in water. |
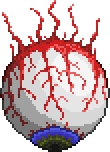
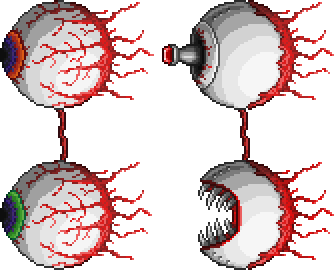
Calamitas
|
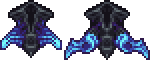
Calamitas is a large scarlet eye with 37,500 total health (60,000 in Expert Mode, 82,800 in Revengeance Mode, and 132,400 in Death Mode). She is summoned by using an Eye of Desolation at night. Calamitas behaves much like Retinazer, hovering around the player and firing lasers at them, though her lasers will burst into three fast, homing versions after a short time. When defeated, she resurrects herself and begins shooting fireballs, as well as summoning her brothers, Catastrophe and Cataclysm. The brothers will spit fireballs and spew a flamethrower, respectively, and charge toward the player. Calamitas will also spawns a Soul Seeker shield at half health, and summon swarms of Life Seekers (or resurrect her brothers in Expert Mode) throughout the fight. Calamitas drops several calamitous weapons and materials. She drops the Void of Calamity in Expert Mode, a After Providence is defeated, all of her stats get buffed, her health raises to 340,000 (544,000), and she begins dropping Bloodstone. |
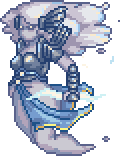
Siren and Leviathan
| File:Siren and Leviathan.png |
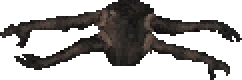
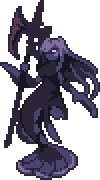 The Leviathan is a colossal aquatic aberration masked by The Siren's amiable appearance. The Siren has 27,400 health (43,840 in Expert Mode, 66,560 in Revengeance Mode, and 93,840 in Death Mode) and must be summoned by killing ??? in the Ocean. The Leviathan, appearing when The Siren reaches half health, has 69,000 health (110,400 in Expert Mode, 145,120 in Revengeance Mode, and 303,600 in Death Mode). Although intended to be fought after defeating Plantera, they can be summoned at any point in the game. The Siren will periodically generate an ice shield to protect herself, while attacking the player with a variety of projectiles and summoning water clones to assist her. The Leviathan will spend most of her time at the player's side, repeatedly launching orbs of energy and summoning minions, while occasionally charging into the player. If either of them are defeated, the boss left alive will become enraged, increasing the aggressiveness of their attacks. The Leviathan (or The Siren, depending on who is killed last) drops ocean-themed weapons and accessories. They also drop Leviathan Ambergris in Expert Mode, an accessory which grants many boosts and effects when submerged in liquid and releases poisonous seawater as the player moves. |
Astrum Aureus
|
Astrum Aureus is a massive astral-infected cyborg with 63,750 health (102,000 in Expert Mode, 130,080 in Revengeance Mode and 201,760 in Death Mode). It can only be summoned on the surface at night using an Astral Chunk. It crawls around and occasionally jumps into the air to crush the player. It also fires astral crystals and lasers at varying speeds at the player. Astrum Aureus drops an abundance of Stardust, Fallen Stars and Aureus Cells. After Moon Lord has been defeated, it gains massive stat boosts and also begins dropping high amounts of Lunar Fragments, and, in Revengeance Mode, the Suspicious Looking Jelly Bean mount. |
Astrum Deus

|
Astrum Deus is a group of 11 astral god worms that have 105,000 total health (168,000 in Expert Mode, 226,800 in Revengeance Mode, and 344,400 in Death Mode). Defeating them allows the player to mine Astral Ore from the Astral Infection biome. They are summoned by using the Starcore anywhere at night. Of the worms in the swarm, there will be one that is longer and more translucent than the rest, which will be invincible until all other worms are killed. One of the smaller worms will have a ring of probes orbiting its head, which will each fire astral orbs that linger in place for a long duration. The probes will transition onto another worm if the one they are orbiting is killed. Astrum Deus drops astral-themed weapons and an abundance of Stardust. It drops the Astral Bulwark accessory in Expert Mode, which provides immunity to the God Slayer Inferno debuff and causes astral stars to fall from the sky when hit. |
The Plaguebringer Goliath

|
The Plaguebringer Goliath is a bee-like amalgamation of infected flesh and metal with 58,500 health (93,600 in Expert Mode, 123,640 in Revengeance Mode, and 176,000 in Death Mode). She is summoned by using an Abombination in the Jungle. Being an infected Queen Bee, she possesses similar attacks, although improved and much more dangerous. Upon reaching half health, The Plaguebringer Goliath will release a Plague Nuke Barrage, launching a multitude of devastating plague missiles in quick succession. She will periodically perform this attack for the rest of the fight. The Plaguebringer Goliath drops plague-themed weapons and several Plague Cell Canisters. She drops the Toxic Heart in Expert Mode, an accessory that creates a damaging Plague aura around the player, though weakening them at high health amounts. |
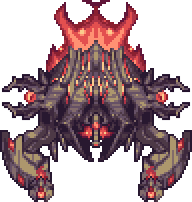
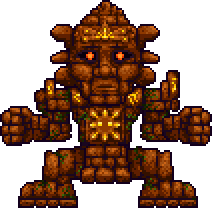
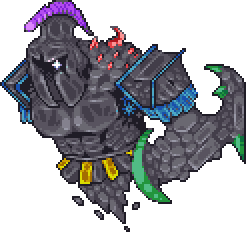
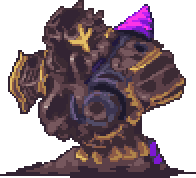
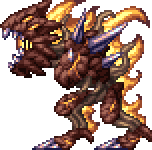
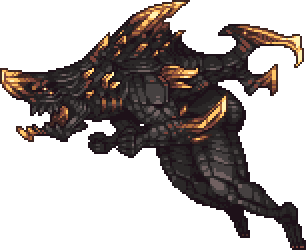
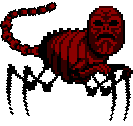
Ravager
|
The Ravager is an ancient flesh golem with 150,000 total health (240,000 in Expert Mode, 246,400 in Revengeance Mode, and 560,000 in Death Mode), split across the main boss and its five body parts. It is summoned with the Ancient Medallion anywhere on the surface. It behaves similarly to the Golem, attempting to jump onto the player and slam back down on them and hit them with its claws. When its claws and feet are destroyed, sparks and fireballs will be shot from the empty sockets. It will also summon large stone pillars, fire-throwing pillars, homing missiles and, after its head is destroyed, bursts of lasers and white bolts in every direction. Each of its five body parts must be destroyed before the Ravager itself can be damaged. The Ravager drops a blood-themed weapon and two powerful accessories: The Flesh Totem, which cuts enemy contact damage in half every 15 seconds, and the Blood Pact, which doubles the player's maximum health, but allows them to be critically hit at a 25% chance. The Ravager also drops all ingredients to the Core of Calamity and also all the ingredients to the Bar of Life. After Providence is defeated, all of its stats are buffed, its health raises to 1,030,000 (1,648,000) total, and it begins dropping Bloodstone. It also begins dropping the Bloodflare Core accessory in Expert Mode, which creates a life-draining aura around the player and grants numerous other benefits. |
Post-Moon Lord Bosses
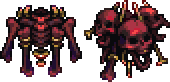
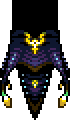
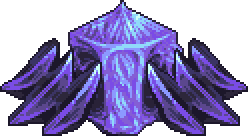
Profaned Guardians

|
The Profaned Guardians are servants to Providence with a total of 167,500 health (241,500 in Expert Mode), split across three entities. They are summoned by using a Profaned Shard in either the Underworld or the Hallow. Each of the three entities serve a different role in the fight and possess various attacks, such as charging, shooting fireballs and flares, and firing daybreak spears. The Profaned Guardians only drop the Profaned Core, which is used to summon their Goddess. |
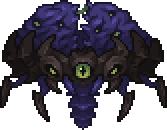
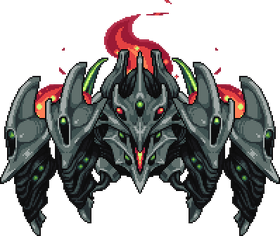
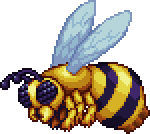
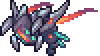
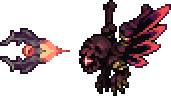
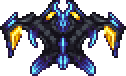
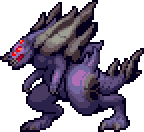
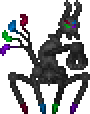
Bumblebirb
| File:Bumblebirb.png |
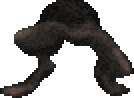
Bumblebirb is a bumbling birb that has 227,500 health (364,000 in Expert Mode, 404,000 in Revengeance Mode, and 484,000 in Death Mode). It can be summoned using Birb Pheromones in the Jungle. Several of them are also summoned during Jungle Dragon, Yharon's final phase. It attacks by charging, flying around incredibly quickly, launching bursts of electric feathers and creating copies of itself. Bumblebirb drops weapons themed around birds and red lightning, as well as Effulgent Feathers, which are used to craft the Dragon Egg, Dragonfruit and the Silva armor. |
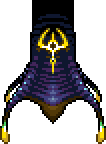
Providence, the Profaned Goddess

|
Providence, the Profaned Goddess is a fiery deity of light and dark with 440,000 health (704,000 in Expert Mode, 800,000 in Revengeance Mode, and 1,144,000 in Death Mode). She is the first major Post-Moon Lord boss, and her defeat causes several prior bosses to be buffed. She is summoned in the Hallow or Underworld using a Profaned Core. She has many dangerous attacks and several different phases, such as hiding in her cocoon while emitting flames and spears, dropping flare bombs on the player, shooting molten globes, summoning Profaned Guardians and firing crystals and a sweeping laser beam. Providence drops weapons themed around the profaned flame, and an abundance of Unholy Essence and Divine Geodes. If she is defeated in the Hallow, she will drop the highly mobile Elysian Wings in Expert Mode. If she is defeated in the Underworld, she will drop the heavily defensive Elysian Aegis in Expert Mode. She will always drop the Rune of Kos, a non-consumable item which is used to summon the Sentinels of the Devourer. Uelibloom Ore will generate in Mud Blocks upon her first defeat. |
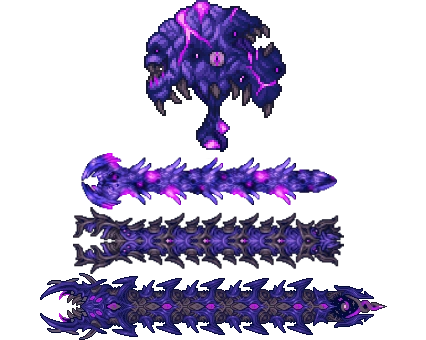
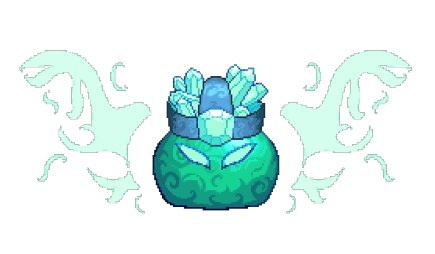
Sentinels of the Devourer

|
Sentinels of the Devourer are a set of 3 cosmic guardian bosses summoned using the Rune of Kos in different areas of the world. Ceaseless Void (150 / 400 health) is summoned in the Dungeon, Storm Weaver (400,000 / 640,000 health) in the Sky, and Signus, Envoy of the Devourer (280,000 / 448,000 / 712,800 / 1,155,600 health) in the Underworld. Each sentinel drops cosmic-themed weapons and accessories, as well as materials for powerful equipment, which also serve as ingredients for the Cosmic Worm. |
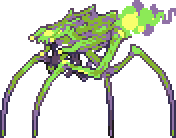
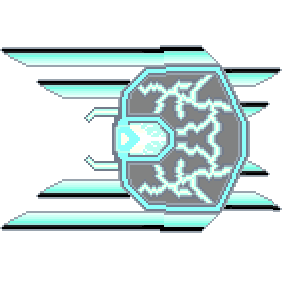
Polterghast

|
Polterghast is a ravenous ethereal being with 412,500 health (660,000 in Expert Mode, 792,000 in Revengeance Mode, and 1,056,000 in Death Mode). It can be summoned by killing 30 Phantom Spirits or by using the Necroplasmic Beacon in the Dungeon. It has 3 different forms and various attacks from spitting bouncing bolts and mines to trying to ram into the player and hit them with its hooks, all while summoning minions and clones of itself to assist it. Polterghast drops phantoplasmic-themed weapons, as well as Ruinous Souls, which are used to craft the Bloodflare armor. It also drops the Affliction accessory in Expert Mode, which grants various powerful buffs to the player and their teammates. Defeating it causes Abyss and Sulphurous Sea minibosses to drop weapons and Adult Eidolon Wyrms to spawn in the lower layers of the Abyss. |
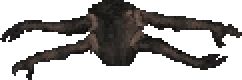
The Devourer of Gods

|
The Devourer of Gods is an enormous cosmic worm with a total of 1,275,000 health (2,040,000 in Expert Mode, 2,300,000 in Revengeance Mode, and 3,808,000 in Death Mode). The Devourer of Gods is a difficult boss, requiring significant preparation before attempting to fight, and causing several changes to the world after its defeat. It is summoned with a Cosmic Worm anywhere at any time. The Devourer of Gods drops cosmic-themed weapons, as well as Cosmilite Bars, a versatile Post-Moon Lord material. It also drops the Nebulous Core accessory in Expert Mode, which summons protective nebula stars, buffs several of the player's stats, and grants a chance to revive the player after they take fatal damage. |
Jungle Dragon, Yharon
|
Jungle Dragon, Yharon is a godly dragon with 2,275,000 health (3,640,000 in Expert Mode, 4,040,000 in Revengeance Mode, and 4,840,000 in Death Mode). He is summoned with a Dragon Egg in the Jungle. Yharon is incredibly powerful and has dozens of attacks and several phases, each harder than the last. Some of his attacks include spewing Detonating Flames, summoning massive flarenados, ramming at great speeds, and teleporting around the player. His last phase can only be fought after certain bosses and enemies have been defeated, otherwise he will simply deem the player unworthy and leave. Once accessible, his last phase is very difficult as Yharon regains all of his health, and then assaults the player by raining meteors, summoning swarms of Bumblebirbs, and dropping flares which burst on impact. After his first phase has been defeated, Solar Eclipses become significantly more difficult and Mothron will begin to drop Darksun Fragments. When his second phase has been defeated, Auric Ore, one of the final crafting materials, will generate underground. Jungle Dragon, Yharon drops weapons themed around dragons and fire, as well as the Yharim's Gift accessory in Expert Mode, which grants multiple powerful buffs and leaves behind exploding dragon dust as the player moves. |
Superbosses
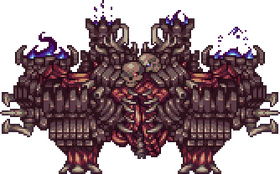
Supreme Calamitas
|
Supreme Calamitas is an incredibly powerful superboss, generally regarded currently as the most difficult boss in the Calamity Mod. She has 5,000,000 health (8,000,000 in Expert Mode, 8,800,000 in Revengeance Mode, and 10,000,000 in Death Mode). She is summoned anywhere at any time with the Eye of Extinction. Supreme Calamitas' attacks are primarily enormous waves or floods of projectiles which are very difficult to dodge, which become more chaotic and introduce more elements as the fight progresses. She also summons servants to aid her, such as her brothers, Soul Seekers, and Sepulcher. Her main drop is Calamitous Essence, which is used to craft Shadowspec Bars, the final crafting material. She can also drop various Developer items directly. |
Mini Bosses
Giant Clam
|
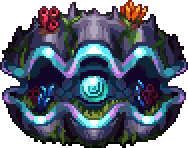
The Giant Clam is a large clam mini-boss with 1,250 (2,500) health in Pre-Hardmode, and 7,500 (15,000) in Hardmode. It makes nearby Clams aggressive and attacks by teleporting on top of the player and closing its shell, spawning additional Clams. In Hardmode, it gains additional attacks utilizing psychic pearls. It can be found uncommonly in the Sunken Sea. It drops the Giant Pearl in Pre-Hardmode. In Hardmode, it additionally drops Mollusk Husks, the Poseidon, the Clamor Rifle, the Shellfish Staff, and the Clam Crusher. It also drops the Sea King if he is not already present in the world. |
Cloud Elemental
| File:Cloud Elemental.png |
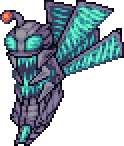
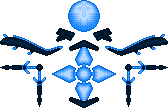
The Cloud Elemental is a well-armored air-based mini-boss with 6,000 (12,000) health. She attacks by summoning sets of three tornadoes, which linger for a certain amount of time before she summons them again. She can be found rarely in Space during Hardmode while it is raining. She drops the Eye of the Storm, which summons a friendly cloud elemental and can be crafted into the Heart of the Elements, as well as the Storm Saber. |
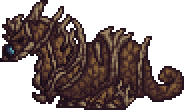
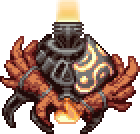
Earth Elemental

|
The Earth Elemental is a large armored earth-based mini-boss with 3,800 (7,600) health. It travels through blocks, floating directly at the player to deal contact damage. It also fires bursts of rock projectiles at the player. It will appear rarely in the Cavern layer during Hardmode, often ambushing unsuspecting players. It drops earth and rock related weapons like the Aftershock, Slag Magnum and Earthen Pike, as well as the Arid Artifact which starts a Sandstorm shortly after use. |
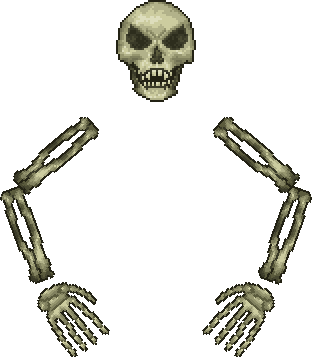
Armored Digger

|
The Armored Digger is a steel worm mini-boss with 20,000 (40,000) health that spawns in the cavern layer after Plantera has been defeated. It attacks by charging at the player and turning, akin to The Destroyer. It also fires small yellow projectiles from its segments, which fall and linger on the ground. It drops Demonic Bone Ash, and occasionally, Draedon's Remote which summons buffed variants of the three Mechanical Bosses. |
Great Sand Shark

|
The Great Sand Shark is a vicious Sandstorm shark mini-boss with 8,000 (12,800/17,600/25,600) health. It swims through the sand and leaps out to attack the player with special movements, while summoning Sand Sharks to assist it. It either spawns after killing 20 Sand Sharks, or is summoned by using a Sandstorm's Core in the Desert. It drops a Grand Scale, which can be used to craft powerful upgrades to previous weapons. |
Plaguebringer
|
The Plaguebringer is a bio-mechanical bee mini-boss with 3,000 (6,000/8,000) health. It acts very similar to Queen Bee, cycling between a horizontal ram and shooting stingers from above while spawning Plague Chargers. It appears randomly in the Jungle after Golem has been defeated, making the area quite hazardous to inhabit until the player acquires stronger gear. It drops an abundance of Plague Cell Canisters, which can be crafted into several plague-related items. |
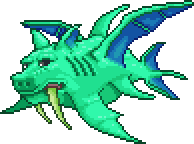
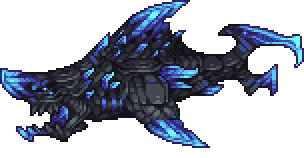
Mauler
|
The Mauler is a mutant shark mini-boss with 165,000 (330,000) health. It is passive at first, only attacking the player if they get too close or deal damage to it. Once aggressive, it swims extremely fast towards the player while shooting sulphuric mist at them. It also explodes if it is out of the water for too long. It spawns rarely in the Sulphurous Sea. It drops several Shark Fins, as well as the Sulphuric Acid Cannon after Polterghast has been defeated. |
Colossal Squid

|
The Colossal Squid is an enormous cephalopodic mini-boss with 220,000 (440,000) health. It is passive at first, only attacking the player if they get too close or deal damage to it. Once aggressive, it attempts to float onto the player and crush them underneath itself or shoot ink bombs. It appears in the third layer of the Abyss. It drops lots of Black Ink, as well as the Calamari's Lament after Polterghast has been defeated. |
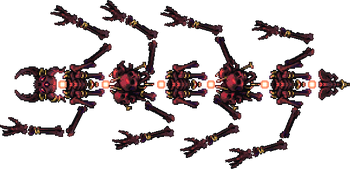
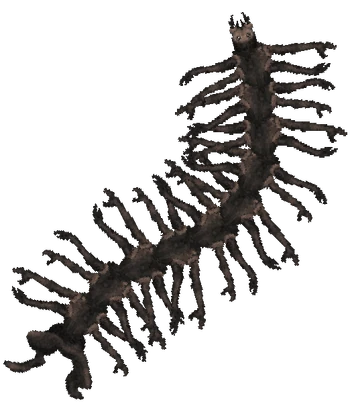
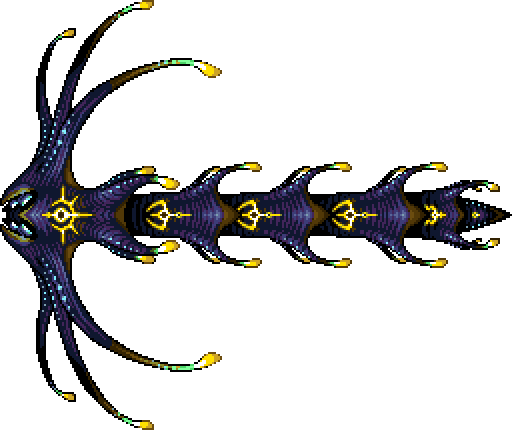
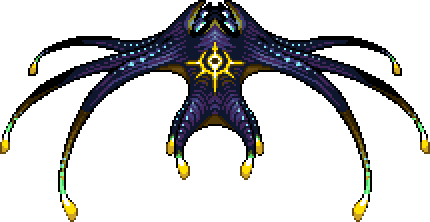
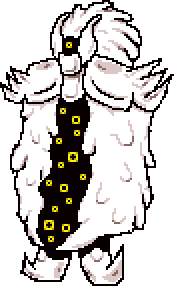
Eidolon Wyrms
| File:Eidolon Wyrm (Juvenile).png |
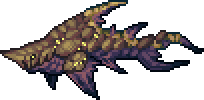
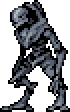
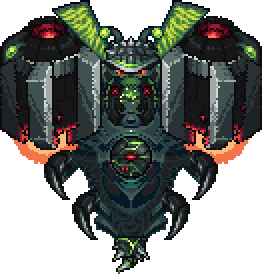
Eidolon Wyrms are massive ghostly serpent mini-bosses. The Juvenile Eidolon Wyrm has 160,000 (320,000) health, while the Adult Eidolon Wyrm has 1,000,000 (2,000,000) health. They initially float nearby the player and deal no damage, but will become hostile if attacked. They attack by dealing contact damage with their heads, as well as summoning ice shards and streaks of lightning. The Adult will also throw the player around with telekinesis. They appear in two lowest layers of the Abyss, with the Adult spawning either by by using the Rod of Discord in Abyss, or naturally after Polterghast has been defeated. They drop an abundance of Lumenyl, Ectoplasm and Voidstone, as well as the Soul Edge and the Eidolic Wail after Polterghast has been defeated. |
Reaper Shark

|
The Reaper Shark is a brutal yet stealthy mini-boss with 190,000 (380,000) health. It is passive at first, only attacking the player if they get too close or deal damage to it. Once aggressive, it swims towards the player, being able to pass through blocks, and also charges them occasionally. It appears in the two lowest layers of the Abyss. After Polterghast has been defeated, it drops the Valediction and Reaper Teeth, along with several Cloaking Glands. |
Vanilla Boss Additions
The Calamity Mod adds several differences to vanilla bosses ranging from drops to behavior in other difficulty modes.
Boss Progression
|
|
| |||||||||||||||||||||||||||||||||||||||||||||||||||||||||||||||||


Boss summoning items
The Calamity Mod enables town NPCs to sell boss summons after that boss has been killed in the world. Most of the Pre-Hardmode summoning items are sold by the Dryad and most of the Hardmode summoning items are sold by the Wizard.
| NPC | Item | Price | |
|---|---|---|---|
| Template:Item link | Template:Il2c | 40 | |
| Template:Item link | Template:Il2c | 1 | |
| Template:Il2c | 2 | ||
| Template:Il2c | 2 | ||
| Template:Il2c | 3 | ||
| Template:Il2c | 4 | ||
| Template:Il2c | 6 | ||
| Template:Il2c | 6 | ||
| Template:Il2c | 10 | ||
| Template:Il2c | 10 | ||
| Template:Il2c | 15 | ||
| Template:Il2c | 20 | ||
| Template:Il2c | 25 | ||
| Template:Il2c | 25 | ||
| Template:Item link | Template:Il2c | 8 | |
| Template:Il2c | 20 | ||
| Template:Il2c | 30 | ||
| Template:Il2c | 50 | ||
| Template:Il2c | 50 | ||
| Template:Il2c | 20 | ||
| Template:Item link | Template:Il2c | 15 | |
| Template:Il2c | 20 | ||
| Template:Il2c | 20 | ||
| Template:Il2c | 30 | ||
| Template:Il2c | 30 | ||
| Template:Il2c | 3 | ||
| Template:Il2c | 10 | ||
| Template:Item link | Template:Il2c | 15 | |
| Template:Il2c | 20 | ||
| Template:Il2c | 20 | ||


.png)