| Type | Boss |
|---|---|
| Environment | Surface |
| Max Life | 143,565 / 192,565 / 206,805 (total) (pre-Providence) 717,825 / 962,825 / 1,034,025 (total) (post-Providence) |
| KB Resist | 100% |
| Inflicts debuff | |
| Debuff duration | Infinite in Phase 2 |
| Debuff tooltip | Your vertical movement is weakened |
| Immune to |
| Coins | 25 35 |
|---|
- Item (Quantity)Rate
 Fleshy Geode(Before defeating Providence)100%
- Necromantic Geode(After defeating Providence)100%
- One of the following five items will always be dropped:
- 25% / 33.33%
- 25% / 33.33%
- 25% / 33.33%
- 25% / 33.33%
- 25% / 33.33%
- Bloodflare Core(After defeating Providence)100%
- 33.33% / 50%
- 33.33% / 50%
- 10%
- 5%
- Greater Healing Potion (5-15)100%
- 14.29%
- 10%
- Ravager (Lore)(Always on first kill)100%
- Treasure Bag(Ravager)
- • Infernal Blood(In Revengeance Mode only)
100% - •


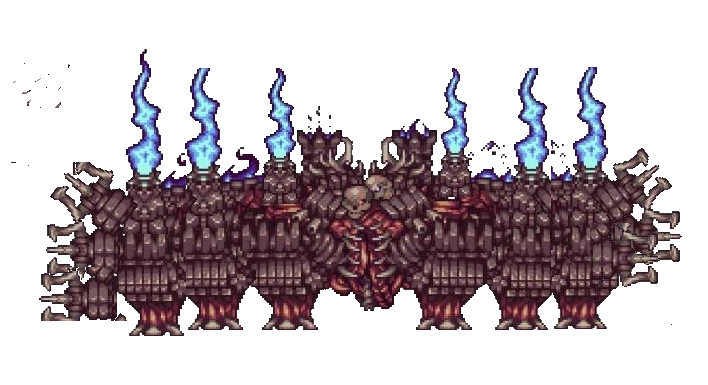
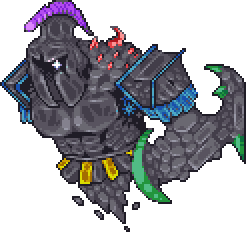
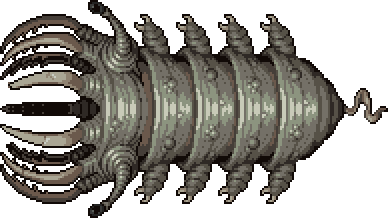
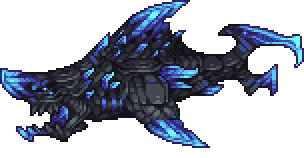
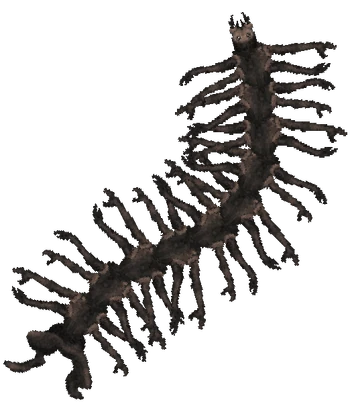
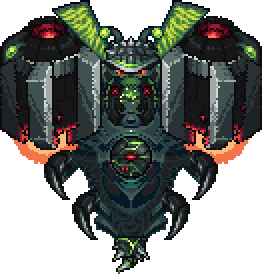
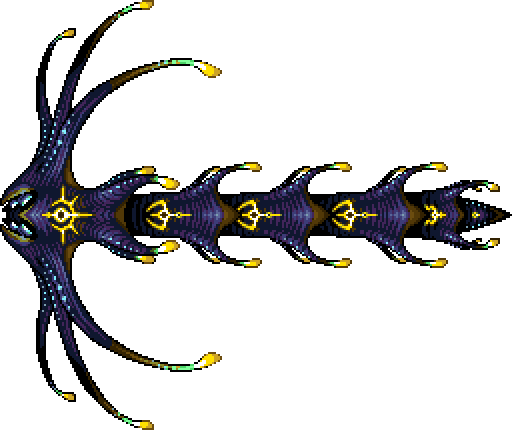
![]() "The flesh golem constructed using twisted necromancy..."
"The flesh golem constructed using twisted necromancy..." ![]()
The Ravager (Japanese: 破壊 Hakai) is a Hardmode boss that is found at the top floor of the silo in the Bloody Corn Maze ![]() . On top of dropping a unique set of weapons and accessories, its purpose is to act as an efficient, though not necessarily easy, means of acquiring Life Alloys, Cores of Calamity, and other materials via Fleshy Geodes.
. On top of dropping a unique set of weapons and accessories, its purpose is to act as an efficient, though not necessarily easy, means of acquiring Life Alloys, Cores of Calamity, and other materials via Fleshy Geodes.
This boss receives a significant buff after Providence, the Profaned Goddess has been defeated, and it will begin to drop large amounts of Bloodstone as well via Necromantic Geodes.
Spawn[]
The Ravager is found at the top floor of the large silo at the ocean side of the Bloody Corn Maze, in a deactivated state. Hitting the deactivated Ravager will initiate the fight. After being killed, the deactivated Ravager will respawn at the start of the next ingame day.
When summoned, The Ravager will make a screaming sound instead of the regular boss roar.
Behavior[]
The Ravager acts in a manner similar to the Golem, in that it is primarily grounded, travels by jumping, attacks the player with launching its claws at them as well as firing various projectiles, and that its body is immune to damage until all of its limbs are broken.
Attacks[]
- Every few seconds, the Ravager jumps and attempts to hover a few blocks above the player. When it’s right above the player, it slams down, creating a giant shockwave that damages anyone touching the ground nearby. The rate at which these jumps occur increases the less life its limbs have.
- After the legs have been broken, the slam deals less damage, but the destroyed feet will occasionally drop sparks which linger on the ground for two seconds.
- The Ravager’s claws shoot out at the player at set intervals, retracting after they take damage or travel 45 tiles away from the Ravager. The speed and rate at which the claws shoot out increases as their life decreases.
- Once broken, fireballs will be horizontally fired from the area where the claws were once every 3 seconds. These projectiles are unaffected by gravity and bounce off of surfaces up to four times, dissipating after hitting a block a fifth time. The fireballs also automatically dissipate after ten seconds.
- Every 12 seconds, the Ravager’s head fires a nuke straight up, which homes in on the player and explodes after 11 seconds.
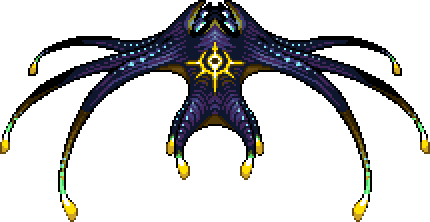
- Once broken, the head detaches itself, becomes vulnerable, and hovers below the player and the body fires a total of 54 lasers in a large spread towards the player. The head will then attempt to charge the player for 3 seconds, during which it will fire red bolts in bursts of 2 every second. After charging, it will 2 nukes that flank the player and blow up after only 4 seconds.
- The red bolts shot by the head travel through blocks for the first 0.4 seconds after they’re fired, for a distance of approximately 16 tiles.
- After the head is destroyed, the Ravager will fire nukes upward twice as fast.
- Once broken, the head detaches itself, becomes vulnerable, and hovers below the player and the body fires a total of 54 lasers in a large spread towards the player. The head will then attempt to charge the player for 3 seconds, during which it will fire red bolts in bursts of 2 every second. After charging, it will 2 nukes that flank the player and blow up after only 4 seconds.
- Once the head and limbs are destroyed, Ravager's body becomes vulnerable. Ravager continues all of its previous attacks, including its jumps, sparks, lasers, fireballs, nukes, and head bolts. The body must be destroyed to end the fight.
Expert Mode[]
- The height of the Ravager’s jumps is greatly decreased, but their speed increases as the Ravager’s life decreases.
- The fireballs and lasers have an increased rate of fire.
- Upon landing after a jump, the Ravager alternates between summoning the following:
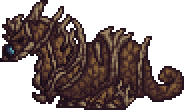
- Two tall Rock Pillars that jump in a wide arc in the direction in the player is facing, while shooting red bolts in random directions. These pillars will jump a total of two times, then attempt to ram the player by sliding for 5 seconds, then blowing up and releasing Boulder Bunches.
- The pillars are summoned 27 blocks to the left and right of the player.
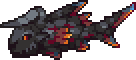
- Two Flame Pillars that fire blue flames into the air. These Flame Pillars cannot be destroyed, but automatically despawn after 20 seconds.
- The pillars are summoned 45 blocks to the left and right of the player.
- The direction the blue flames are shot at cycle between straight up, angled slightly to the right, and angled slightly to the left.
- When they despawn, they leave a Ravaging Flame behind that homes in on the player for the rest of the fight.
- Two tall Rock Pillars that jump in a wide arc in the direction in the player is facing, while shooting red bolts in random directions. These pillars will jump a total of two times, then attempt to ram the player by sliding for 5 seconds, then blowing up and releasing Boulder Bunches.
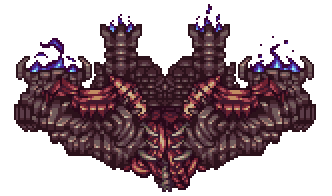
- Once all of the Ravager’s limbs are destroyed, it enters a second phase. During this phase, the Weak Petrification debuff is applied to all players, essentially forcing them to the ground by reducing their flight time by 80%, disabling most additional jumps, removing all jump height boosts, disabling mounts, and disabling gravity control.
- All previous attacks from the body cease; it no longer leaves behind sparks or fires nukes or lasers. However, the broken head will still continue to fire red bolts.
- The Ravager jumps into the air, hovering above and towards the player if they aren’t vertically aligned with it. Once it is vertically aligned, it pauses for a brief moment before quickly slamming down. The speed the Ravager jumps and slams down increases as its health decreases.
- The Ravager will only deal contact damage while slamming downwards during this jump.
Revengeance Mode[]
- The Ravager jumps more frequently.
- The Ravager’s jumps in phase 1 have a chance of being the tall jumps in Normal Mode, the short jumps in Expert Mode, or an extra tall jump that gains height the higher up the player is compared to it, up to a maximum of 135.43 blocks.
- The homing nukes track the player more accurately and are much faster.
- The Rock Pillars are summoned in groups of 4 instead of 2 and release twice as many Boulder Bunches on death.
- The red bolts home directly on to the player, accelerating rapidly after a few seconds.
- The Flame Pillars launch an unlimited range, constant flame wall instead of blue flames, forcing the player to go under the pillars to avoid damage.
Death Mode[]
- When the body is at 50% health, all of the Ravager’s body parts respawn with half health.
- The Ravager’s jumps gain even more speed as its life decreases.
- The Ravager’s claws are always launched at maximum speed.
- Flame Pillars fire their flame walls both upwards and downwards, creating barriers that can’t be passed without a teleport or dash.
- The speed of the red bolts fired by the head after it’s broken is doubled.
- Rock Pillars are spawned in groups of 8 instead of 4 and release even more Boulder Bunches on death.
On the For the worthy seed[]
- An additional Rock Pillar spawns directly on top of the player.
- Rock Pillars jump 4 times total and Flame Pillars gain the ability to jump once.
- Ravaging Flames move twice as fast.
- All of the Ravager’s attacks inflict the Stoned debuff.
- Homing Nukes last three times as long and have twice the explosion radius.
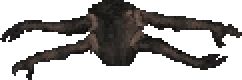
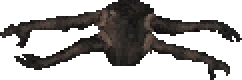
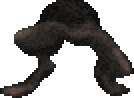
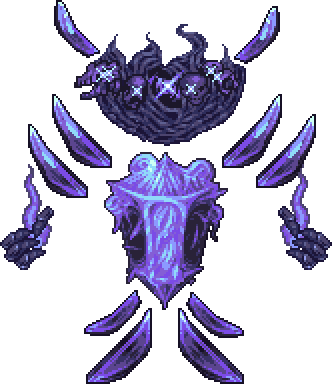
Parts[]

| Type | Boss |
|---|---|
| Environment | Surface |
| AI Type | Ravager Head AI |
| Damage | 0 (Contact) Nukes: 120 / 180 / 208 / 224 (pre-Providence) 180 / 300 / 328 / 344 (post-Providence) |
| Max Life | 32,705 (pre-Providence) 163,525 (post-Providence) |
| Defense | 40 (pre-Providence) 80 (post-Providence) |
| DR | 15% |
| KB Resist | 100% |
| Type | Boss |
|---|---|
| Environment | Surface |
| AI Type | Ravager Body AI |
| Damage | Phase 1 Contact, Phase 2 Stomp: 120 / 192 / 224 / 232 (pre-Providence) 180 / 288 / 336 / 348 (post-Providence) Phase 2 Contact: 0 |
| Max Life | 44,600 / 71,360 / 85,600 (pre-Providence) 223,000 / 356,800 / 428,000 (post-Providence) |
| Defense | 55 (pre-Providence) 110 (post-Providence) |
| DR | 35% |
| KB Resist | 100% |
| Inflicts debuff | 50% chance |
| Debuff duration | 5-7 seconds (Fireball) |
| Debuff tooltip | Slowly losing life |
| Inflicts debuff | 100% chance |
| Debuff duration | 5 seconds (Contact) |
| Debuff tooltip | Your armor is shredded |
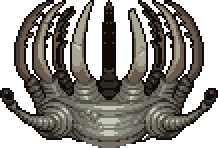
| Left Claw | Right Claw |
 |  |
| Type | Boss |
|---|---|
| Environment | Surface |
| AI Type | Ravager Claw AI |
| Damage | 80 / 160 / 180 / 200 (pre-Providence) 120 / 240 / 270 / 300 (post-Providence) |
| Max Life | 11,120 / 22,240 (pre-Providence) 55,600 / 111,200 (post-Providence) |
| Defense | 40 (pre-Providence) 80 (post-Providence) |
| DR | 15% |
| KB Resist | 100% |
| Inflicts debuff | 100% chance |
| Debuff duration | 3 seconds (Contact) |
| Debuff tooltip | Your armor is shredded |
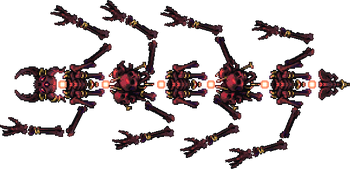
| Left Leg | Right Leg |
 |  |
| Type | Boss |
|---|---|
| Environment | Surface |
| AI Type | Ravager Leg AI |
| Damage | 0 (Contact) |
| Max Life | 22,010 (pre-Providence) 110,050 (post-Providence) |
| Defense | 40 (pre-Providence) 80 (post-Providence) |
| DR | 15% |
| KB Resist | 100% |

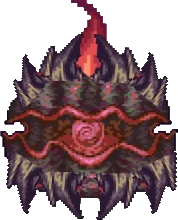
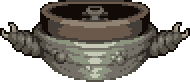
| Type | Boss |
|---|---|
| Environment | Surface |
| AI Type | Ravager Head (Phase 2) AI |
| Damage | 0 (Contact) Missiles: 80 / 136 / 160 / 180 (pre-Providence) 140 / 256 / 280 / 300 (post-Providence) |
| Max Life | 9,591 / 19,182 (pre-Providence) 38,364 / 76,728 (post-Providence) |
| Defense | 40 (pre-Providence) 80 (post-Providence) |
| DR | 15% |
| KB Resist | 100% |
| Inflicts debuff | 100% chance |
| Debuff duration | 3 seconds (Homing missile) |
| Debuff tooltip | Slowly losing life |
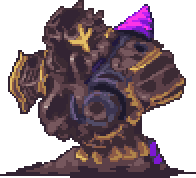
Summons[]
|

| Type | Enemy |
|---|---|
| Environment | Surface |
| AI Type | Rock Pillar AI |
| Damage | 120 / 192 / 224 / 232 (pre-Providence) 180 / 288 / 336 / 348 (post-Providence) |
| Max Life | 5,000 / 10,000 (pre-Providence) 35,000 / 70,000 (post-Providence) |
| Defense | 50 |
| DR | 30% |
| KB Resist | 100% |
| Inflicts debuff | 100% chance |
| Debuff duration | 3 seconds |
| Debuff tooltip | Your armor is shredded |
| Immune to |
| Type | Enemy |
|---|---|
| Environment | Surface |
| AI Type | Flame Pillar AI |
| Damage | 100 / 160 / 192 / 200 (Contact pre-Providence) 150 / 240 / 288 / 300 (Contact post-Providence) 90 / 144 / 172 / 188 (Blue Flame pre-Providence) 150 / 264 / 292 / 308 (Blue Flame post-Providence) |
| Max Life | 3,500 / 7,000 (pre-Providence) 14,000 / 28,000 (post-Providence) |
| Defense | 35 |
| DR | 20% |
| KB Resist | 100% |
| Inflicts debuff | 100% chance |
| Debuff duration | 3 seconds (Blue Flame) |
| Debuff tooltip | It's either really hot or really cold. Either way it REALLY hurts |
| Immune to |
Notes[]
- The Rock Pillars deal contact damage as soon as they are spawned in. It is advised to go around the pillars to prevent cheap hits.
- The Flame Pillars cannot damage a player on contact for the first 1.8 seconds, and blue flames spawn high enough for the player to run below them. However, any height gain may be dangerous as the player may get hit by the flame.
- Ravager can only be summoned on the Surface layer.
- When Ravager spawns during the Boss Rush, it plays the sound of the Death Whistle being used.
Tips[]
- For more elaborate strategies on defeating Ravager, including weapon and arena recommendations, see Guide:Ravager strategies.
- During Phase 1, fly in an arc above it to dodge the boss.
- Ravager's large health pool can make this boss take a long time to defeat, especially post-Providence.
- Using an item with a dash ability or having a speed boost will make it easy to dodge the Ravager's missiles, as they are slow and cannot make sharp turns.
- Every second jump the Ravager makes, the Flame Pillars will spawn by the player. Keep this in mind to prevent running into them, especially while mid-air.
- By having the minimap out, the player can see when exactly the boss is jumping by looking at its icon on the map.
- Ravager can be fought after Plantera is defeated, though it is highly recommended to fight it after Golem is defeated as its high speed and damage can easily overwhelm an unprepared player.
Trivia[]
- Ravager's theme is Open Frenzy, which was composed by the artist DM DOKURO.
- DM DOKURO has commented that the song has a motif related to one of his older pre-Calamity works.
- If the Calamity Music add-on mod is disabled, Plantera will play instead.
- Despite the lore stating it has 'the regenerative durability of a living fortress', the Ravager never regenerates health; however, it does drop Bloodstone once Providence is defeated, which is used in the making of many healing-oriented items.
- Unlike The Plaguebringer Goliath, The Ravager can be fought sometime after defeating Plantera, as its summoning item only requires Lihzahrd Bricks obtained by Bohldohrs, and Solar Tablet Fragments.
- The screaming sound played in the boss' summoning is the same sound played when the player has the Cosmic Plushie equipped and is in a dark area.
- The Ravager was formerly referred to in the mod's files as "Scavenger."
- The reasoning for this was because there was originally going to be an enemy named the Scavenger, who would use the original Ravager sprites.
- The Ravager may be a reference to an enemy of the same name in Minecraft.
- Both enemies are formidable opponents with large health pools.
- The Ravaging Flame sprites are very similar to the sprites for Minecraft’s Soul Speed enchantment effect.
- In the lore, the Ravager is known to destroy farms. Minecraft’s ravagers are capable of destroying crops and vegetation.
- If the Boss Checklist Mod is installed, its unique despawn message will be "The Ravager has finished ravaging the ravaged.”
- Its map Icon is similar to sans' overworld sprite from undertale


